Last Updated on: 7th November 2023, 03:22 pm
Don’t worry if you’ve never touched a line of code before, or if LSL sounds more like a fancy sandwich than a scripting language. We’re going to ease into this like your avatar sliding into a new pair of virtual jeans – comfortably and with style. By the end of this post, you’re not just going to be sitting there with a ‘that’s cool’ expression. You’re going to make something happen in Second Life. That’s right, you’ll have your very own script that you built from scratch. It’s going to be a little bit of learning, a fair amount of doing, and a whole lot of virtual high-fiving. Once it’s all done, you will have mastered some of the Second Life scripting basics.
Think of this as learning how to not accidentally walk into walls. Then we’ll get friendly with variables – they’re not as boring as they sound, I promise. We’ll even throw in a ‘Hello, Avatar!’ because it’s tradition and who are we to mess with tradition? Stick with me, and by the end of this post, you’ll be scripting like a almost pro, ready to tackle all the creative ideas brewing in that brilliant brain of yours.

Introduction to LSL | Second Life Scripting Basics
LSL, or Linden Scripting Language, is the backbone of all the cool stuff you see and do in Second Life. It’s the puppet strings that make things move. It’s been around since Second Life first popped onto the scene, evolving along with the platform. LSL is what makes your virtual coffee machine spit out coffee, or your avatar have sex. If you can dream it, LSL can probably do it.
Now, where do you start scripting? You’ve got two choices. You can go full native and script right inside Second Life using their built-in script editor – it’s as in-world as you can get, and you’ll see the fruits of your labour instantly. Pretty cool for instant gratification.
But maybe you’re a bit of a control freak, or you just like having your stuff organized in one place. In that case, external editors are your friends. These come with all the bells and whistles: syntax highlighting, error checking, and more. You write your script, you perfect your script, and then you copy-paste it into Second Life and watch it come to life.

Setting Up Your Scripting Space | Second Life Scripting Basics
Before we get our hands dirty, we need to sort out where you’ll be unleashing your newfound LSL prowess. Just like in the real world, finding the right spot in Second Life to get creative is key. You wouldn’t want to be distracted by a passersby when you’re on the brink of your next big eureka moment.
So, here’s how to stake out your perfect scripting spot:
- Sandbox, Sandbox, Sandbox
Second Life is dotted with public sandboxes. These are areas specifically designed for building and scripting without the fear of messing up someone else’s space garden. They’re perfect for beginners. Just remember, these spots are public, so it’s like playing in a real-life sandbox: share nicely and expect an audience.
- Renting a Slice of Heaven
If you’ve got a few Linden dollars burning a hole in your pocket, consider renting. You can get a private piece of land where you can script in your own bubble. The added bonus is you can also show off your creations without someone accidentally walking through your walls.
- Friends with Benefits (And By Benefits, I Mean Land)
Got friends with land? Maybe they’ll let you use a corner for your scripting shenanigans. Just like borrowing a friend’s garage to start your rock band, only with less noise complaints.
Tips for Privacy and Zero Interruptions:
If you’re in a public spot like a sandbox, look for less crowded ones. Less traffic means less lag and fewer distractions. Use privacy screens or build walls. Yes, you can set up your own little private nook even in a public sandbox. Set your status to “Busy” if you don’t want to be bombarded with messages or friendship requests.
And finally, if you’re super serious, turn off notifications. Nothing shatters concentration like a pop-up telling you about the latest virtual pet that you absolutely must buy from Rezz Room.

LSL Script Structure | Second Life Scripting Basics
Every LSL script is like a mini-universe with its own set of rules.
- States: These are the big moods of your script. In LSL, every script must have at least one state, and it’s always waiting for something to happen. The default state is aptly named default, and it’s where all the action begins. Think of states like different scenes in a play – each has its part to play.
- Events: Events are the script’s way of saying, “Hey, something happened!” It could be anything from your avatar taking a seat to someone saying “hi” in chat. These events trigger the code inside them to run. Without events, your script is just a list of good intentions.
- Functions: These are the doers. Want to send a message, change an object’s colour, or play a sound? You’ll need a function for that. Functions are like the verbs in your scripting language – they get things moving.
Here’s a skeletal example to show you how these all fit together:
default {
    state_entry() {
          llSay(0, "Hello, Avatar!");
    }

    touch_start(integer total_number) {
         llSay(0, "Touched!");
    }

}
In this snippet:
default is our state. It’s where everything starts.
- state_entry() is an event that happens when the script starts.
- llSay() is a function that makes your object talk in local chat.
- touch_start() is another event, this one waiting for a touch to do its thing.
Comments
Now, let’s talk about your new BFFs: comments. Comments in scripts are like post-it notes for coders. They start with // for a single line, or /* to start a block and */ to end it, and they don’t affect your code. They’re just there to whisper sweet nothings (or really important somethings) to you and anyone else peeking at your script.
Use them like this:
// This is a single line comment - it's for your eyes only!

/*
This is a block comment.
Useful for longer explanations or temporarily removing chunks of code
without deleting them.
*/
Comments are crucial for reminding yourself what your code is supposed to do, why it’s doing it, and for anyone else who might be looking at your scripts. Plus, they’re lifesavers when you come back to your code after a long day of virtual adventures and think, “What the fuck does this do?”
Variables and Data Types | Second Life Scripting Basics
Now it’s time to dive into the nitty-gritty of LSL with variables and data types.
Think of variables as little storage boxes where you can keep all sorts of stuff. Need to remember the number of times an object was clicked? There’s a variable for that. Want to recall a funny greeting? Yep, variable. They’re super handy because they let you store and retrieve data on the fly. They’re there to keep track of the details that make your script smart and your life easier.
Now, just like you wouldn’t store your virtual fish in the same box as your fire-breathing dragon (chaos, much?), different data needs different storage types. Enter data types:
Integer (int)
These are your whole numbers, no frills. Just like the number of apples in a basket – 1, 2, 3, and so on.
integer applesInBasket = 5;
Float
When you need to get precise, like the exact amount of virtual coffee in your mug, you use a float. It’s a number with a decimal, perfect for measurements.
float coffeeVolume = 1.75;
String
This is for text. Your avatar’s name, a funny line, or the entire script of “Hamlet” – if you’re so inclined – go into strings.
string welcomeMessage = "To be or not to be in Second Life!";
Vector
Ever needed to keep track of a position, size, or color in Second Life? That’s what vectors are for – three values, neatly packaged together.
vector startPosition = <10.0, 20.0, 30.0>;
Rotation
Similar to vectors, but for rotations. If your object spins you round, rotations keep track of that.
rotation spin = <0.0, 0.0, 0.0, 1.0>;
Key
Unique identifiers for objects or avatars.
key avatarKey = "01234567-89ab-cdef-0123-456789abcdef";
List
It’s like a shopping list but for any data types.
list inventoryList = [applesInBasket, coffeeVolume, welcomeMessage];
And there you have it, the core building blocks of data in LSL. Knowing these, you’re all set to start holding onto the bits and bobs that’ll make your scripts tick.

Hello, Avatar! | Second Life Scripting Basics
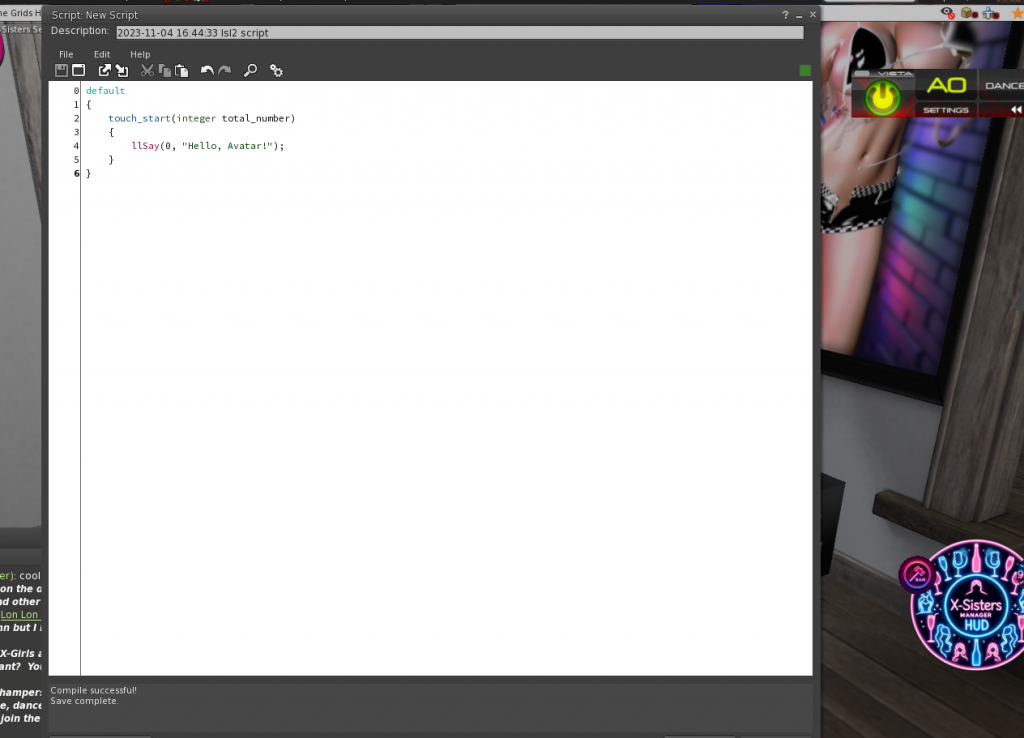
Ok, time to get your hands dirty and script something that responds to a friendly poke—well, a touch in Second Life terms. We’re aiming for that sweet “Hello, Avatar!” moment.
Here’s a basic script you can start with:
default
{
    touch_start(integer total_number)
    {
        llSay(0, "Hello, Avatar!");
    }
}
Let’s break it down, line by line:
Line 1: default
This is the main state of the script. Think of it as ‘home base’ for your script’s operations. All scripts have a default state, and it’s where your script starts its life.
Lines 2-5: The curly brackets { … }
These brackets contain all the code that belongs to the default state. It’s like saying, “everything inside here is part of the default package.”
Line 2: touch_start(integer total_number)
This is an event handler. touch_start is an event that’s called when your object is touched. The integer total_number bit is a parameter that tells you how many times the object was touched. Think of it as your script’s call to action—it’s the “On your marks, get set” before the race.
Lines 3-4: The inner curly brackets { … }
These encase the code that runs when the touch_start event is triggered. It’s your script’s to-do list when someone pokes your object.
Line 4: llSay(0, “Hello, Avatar!”);
Here’s the actual command (function) that does the talking. llSay is a function that makes your object speak. The 0 specifies the chat channel (0 is the public chat, where everyone can hear). “Hello, Avatar!” is the message passed to the function—it’s what your object will say when touched.
And there you have it! When someone gives your object a touch in Second Life, it will now respond with a friendly “Hello, Avatar!” greeting in the public chat.

Listening and Responding | Second Life Scripting Basics
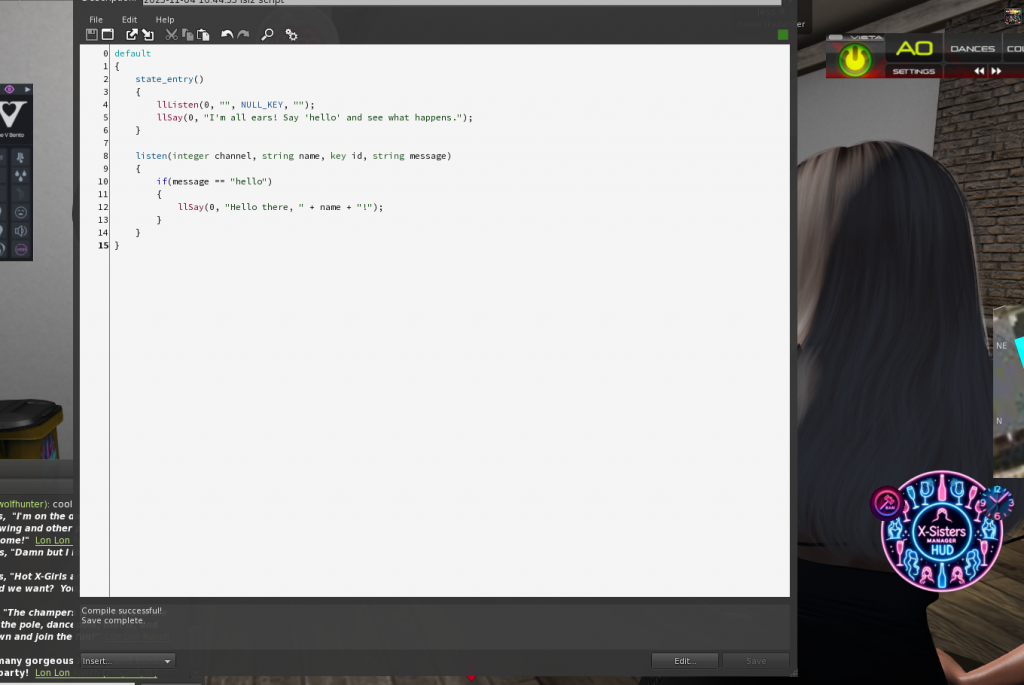
This time, we’re going make your object not just talk, but listen and respond to what’s said to it. A little chit-chat never hurt anyone, even in the virtual world.
Here’s a starter script that listens for a specific phrase in chat and responds to it:
default
{
    state_entry()
    {
        llListen(0, "", NULL_KEY, "");
        llSay(0, "I'm all ears! Say 'hello' and see what happens.");
    }

    listen(integer channel, string name, key id, string message)
    {
        if(message == "hello")
        {
            llSay(0, "Hello there, " + name + "!");
        }
    }
}
Let’s break this down:
Line 1-4: State Entry
The state_entry event is called when the script starts. It’s the starting pistol for your script’s functionality.
Line 3: llListen Function
This line starts the listening process. llListen(0, “”, NULL_KEY, “”); tells the script to listen to channel 0, which is the public chat. The empty quotes and NULL_KEY mean it doesn’t filter messages by name or ID – it’s listening to everyone and everything.
Line 4: llSay Function
The script then immediately says, “I’m all ears! Say ‘hello’ and see what happens.” This lets users know the script is waiting for input.
Lines 6-12: Listen Event
The listen event is what’s called when the script hears something on the channel it’s listening to. It’s where you define how the script should react to different messages.
Line 9: if Statement
The if(message == “hello”) checks if the message is exactly “hello”. If it is, it triggers the code within the curly brackets.
Line 10: Responding with llSay
If someone says “hello”, the object will respond in public chat with “Hello there,” followed by the name of the person who spoke.
And voila! When you put this script into an object, it will tell everyone it’s listening. Then, when someone says “hello” in the public chat, your object will greet them back by name.

Getting Fancy with Functions | Second Life Scripting Basics
Let’s mix things up with some of LSL’s most used functions. Functions are like spells that make your script do amazing things. They’re pre-written bits of code that perform a specific task when you call them.
Here’s a hit parade of functions that scripters in Second Life use almost as often as they blink:
- llSay(): This function makes your object talk in-world.
- llListen(): Listens for chat on a specified channel.
- llSensor(): Detects avatars or objects within a certain range.
- llTriggerSound(): Plays a sound from the object.
- llSetText(): Displays hovering text above an object.
- llStartAnimation(): Makes an avatar play an animation.
- llStopAnimation(): Stops a currently playing animation.
- llRezObject(): Creates another object from inventory.
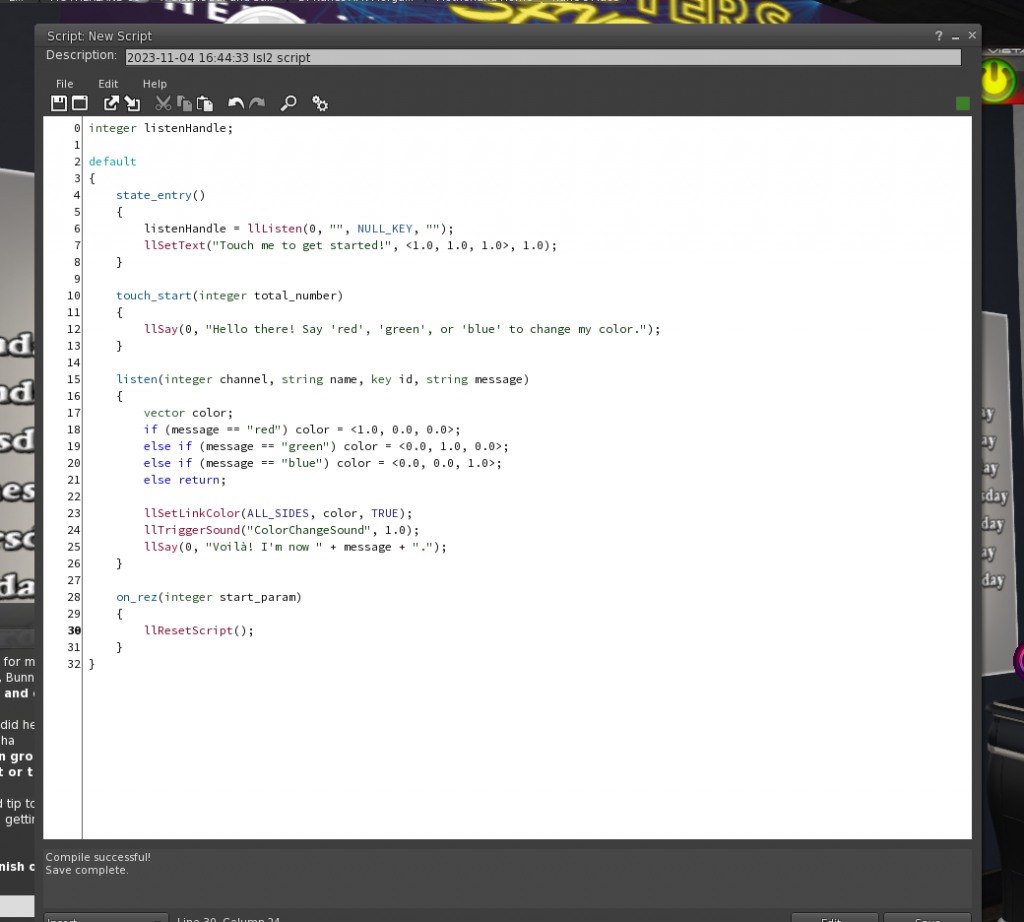
Now, let’s write a script that uses some of these functions to create a more interactive experience. We’ll make an object that:
- Welcomes a user when touched.
- Listens for a command to change its colour.
- Plays a sound when the colour changes.
integer listenHandle;

default
{
    state_entry()
    {
        listenHandle = llListen(0, "", NULL_KEY, "");
        llSetText("Touch me to get started!", <1.0, 1.0, 1.0>, 1.0);
    }

    touch_start(integer total_number)
    {
        llSay(0, "Hello there! Say 'red', 'green', or 'blue' to change my color.");
    }

    listen(integer channel, string name, key id, string message)
    {
        vector color;
        if (message == "red") color = <1.0, 0.0, 0.0>;
        else if (message == "green") color = <0.0, 1.0, 0.0>;
        else if (message == "blue") color = <0.0, 0.0, 1.0>;
        else return;

        llSetLinkColor(ALL_SIDES, color, TRUE);
        llTriggerSound("ColorChangeSound", 1.0);
        llSay(0, "Voilà! I'm now " + message + ".");
    }

    on_rez(integer start_param)
    {
        llResetScript();
    }
}
What’s happening in this script?
When the object is touched, it invites the user to change its colour through chat commands.
When the user types “red”, “green”, or “blue”, the listen event triggers, setting the colour of the object accordingly. It then plays a sound to acknowledge the change (llTriggerSound()), and announces the new color (llSay()). The on_rez event ensures that the script resets if the object is rezzed again, so it’s always ready to go. Try adding this script to an object and start interacting. With each “red”, “green”, or “blue” you’ll see an instant transformation, making your object not just a silent participant but an active resident of Second Life.

Debugging 101 | Second Life Scripting Basics
Diving into scripting can sometimes feel like you’re trying to dance the tango with two left feet. Errors and warnings are like your dance instructor telling you which step you missed. Let’s go through some rookie mistakes and how to fix them, so you can get back to scripting your virtual world masterpiece.
Common Pitfall #1: Typos
Symptom: Script won’t compile, with an error pointing to a line or function.
Fix: Check the spelling and casing of your functions and variables. LSL is case-sensitive!
Common Pitfall #2: Missing Brackets
Symptom: “Syntax error.”
Fix: Ensure all { have a matching }. Each function and event handler must be wrapped in curly braces.
Common Pitfall #3: Mismatched Data Types
Symptom: “Type mismatch.”
Fix: Make sure you’re not trying to put a square peg in a round hole – for instance, storing a string in an integer.
Common Pitfall #4: Listening but Not Hearing
Symptom: Object doesn’t respond to chat.
Fix: Check your llListen filter parameters and make sure the script is actually running (state_entry() must be called).
Common Pitfall #5: Permissions Issues
Symptom: Functions like llStartAnimation don’t work.
Fix: Verify that the script has the necessary permissions, and remember that some permissions need to be granted by the user.
Using Second Life Script Error and Warning Messages
When your script misbehaves, Second Life is kind enough to give you a hint about what went wrong. Here’s how to use those messages:
Read the Error Message: It usually tells you the line number where the issue occurred and gives a brief description.
Check the Line: Go to the line in your script. Errors are sometimes not exactly at the line indicated but look around it as well.
Understand the Error Type
Syntax Error: You’ve broken the grammar rules of LSL. Check your syntax!
Run-Time Error: These happen when the script is running. Could be a divide by zero, a permissions issue, etc.
Logic Error: Trickiest since they don’t produce a formal error. Your script runs but doesn’t do what you expect. Here, you need to double-check your logic flow.
Use the Wiki: The Second Life LSL Wiki is a treasure trove of information. Look up functions and their requirements.
Remember, debugging is a huge part of coding. Even seasoned scripters spend a good chunk of their time squashing bugs. Every mistake is a learning opportunity. With each bug you fix, you’re not just making your script work, you’re also sharpening your skills as a script wizard in the virtual world.

Bringing It All Together | Second Life Scripting Basics
It’s time to roll up our sleeves and craft a full, functional script that’ll show off your newfound LSL skills. We’re going to create a versatile object that welcomes users, changes colour on command, and plays a sound.
Let’s break it down, step by step:
Step 1: Set Up the Basics
// Declare a variable to store the listen handle
integer listenHandle;

default
{
    // Start off with the state entry point of the script
    state_entry()
    {
        // Start listening to public chat on channel 0
        listenHandle = llListen(0, "", NULL_KEY, "");
        // Display floating text above the object
        llSetText("Touch me to get started!", <1.0, 1.0, 1.0>, 1.0);
    }
}
Here, we’ve set up the default state with a state_entry() event that initiates listening and sets up some welcoming text.
Step 2: React to Touch
    touch_start(integer total_number)
    {
        // Greet the user and give instructions
        llSay(0, "Hello there! Say 'red', 'green', or 'blue' to change my color.");
    }
This part of the script makes the object speak when touched, providing instructions to the user.
Step 3: Listen and Respond to Chat
    listen(integer channel, string name, key id, string message)
    {
        // Declare a vector to store the color
        vector color;

        // Determine the color based on the message
        if (message == "red") color = <1.0, 0.0, 0.0>;
        else if (message == "green") color = <0.0, 1.0, 0.0>;
        else if (message == "blue") color = <0.0, 0.0, 1.0>;
        else return; // If the message isn't a color command, ignore it

        // Change the color of the object
        llSetLinkColor(ALL_SIDES, color, TRUE);
        // Play a sound to confirm the color change
        llPlaySound("ColorChangeSound", 1.0);
        // Announce the color change
        llSay(0, "Voilà! I'm now " + message + ".");
    }
In the listen event, we’re checking for colour commands and then changing the object’s colour accordingly. It also plays a sound to provide auditory feedback.
Step 4: Reset When Rezzed
    on_rez(integer start_param)
    {
        // Reset the script whenever the object is rezzed
        llResetScript();
    }
The on_rez event resets the script whenever the object is rezzed to ensure it’s ready for interaction.
Step 5: Wrap It Up with Cleanup
    // Clean up when the script is stopped or reset
    state_exit()
    {
        // Stop listening to chat when the script ends
        llListenRemove(listenHandle);
    }
}
The state_exit() event stops the object from listening to the chat to clean up resources when the script ends.
Final Script:
Here’s how all the pieces fit together to make your object come to life:
integer listenHandle;

default
{
    state_entry()
    {
        listenHandle = llListen(0, "", NULL_KEY, "");
        llSetText("Touch me to get started!", <1.0, 1.0, 1.0>, 1.0);
    }

    touch_start(integer total_number)
    {
        llSay(0, "Hello there! Say 'red', 'green', or 'blue' to change my color.");
    }

    listen(integer channel, string name, key id, string message)
    {
        vector color;
        if (message == "red") color = <1.0, 0.0, 0.0>;
        else if (message == "green") color = <0.0, 1.0, 0.0>;
        else if (message == "blue") color = <0.0, 0.0, 1.0>;
        else return;

        llSetLinkColor(ALL_SIDES, color, TRUE);
        llPlaySound("ColorChangeSound", 1.0);
        llSay(0, "Voilà! I'm now " + message + ".");
    }

    on_rez(integer start_param)
    {
        llResetScript();
    }

    state_exit()
    {
        llListenRemove(listenHandle);
    }
}
Deploying the Script:
- Copy the script into your Second Life viewer’s script editor.
- Save it and watch your object come to life.
- Interact with your object, and see the magic happen!
That’s it! You’ve combined listening, responding, and object manipulation into one full script. Remember, this is just the beginning. There’s a whole universe of possibilities to explore in LSL scripting. Keep experimenting, keep learning, and most importantly, keep having fun with it!

Next Steps in Your Scripting Journey
You’ve dipped your toes into the digital waters of scripting in Second Life, and look at you—you’re actually doing it! You’ve crafted a script that listens, speaks, and even changes colors. But where to from here? The horizon is just the beginning.
Resources for Further Learning
LSL Wiki: The LSL Wiki is your bible now. It’s an encyclopedic trove of all things LSL. Whenever you’re unsure about a function, event, or constant, make it your first port of call.
Second Life Script Library: Maintained by residents this script library has a good collection of both old and new scripts. There are many open-source LSL script repositories online. They are like recipe books filled with ready-to-taste scripts. Peek into them and modify the scripts to learn how they work.
Forums and Communities: Join Second Life scripting forums and Discord channels. Other scripters are a goldmine of info and insights. And guess what? Most of them actually love to help out!
Tutorials and Classes: Keep an eye out for scripting tutorials on platforms like YouTube or in-world classes hosted by scripting veterans. They can offer visual and practical approaches that articles can’t.
Practice, Practice, Practice: There’s no substitute for it. Try to script something every day, even if it’s small. It’s like muscle memory.
Challenges to Explore
Animations: Make your objects come alive with movements.
Particle Systems: Create stunning visual effects.
Communication: Let your scripts talk not just to users but to each other.
Game Mechanics: Start simple with things like scoreboards or timers, and work your way up to full-blown game systems.
API Integrations: Did you know you can have your scripts interact with web services? You can integrate with things like Discord or even Lovense.
Remember, every scripter in Second Life started where you are now. You’ve already proven you can do it, so just imagine what’s next. Think of something you wish existed in Second Life and try to make it. Don’t be afraid of bugs; they’re not gremlins although they might be just as pesky.
So, take a deep breath, and dive back in. The only way to fail is to stop trying. Go forth, script something amazing, and maybe one day, it’ll be your script that everyone’s talking about. Keep pushing those boundaries, and keep scripting!
Subscribe to get all the latest posts straight to your email!


Pingback: How to Make Money in Second Life | A Comprehensive Guide
Pingback: Growing Your Second Life Blog | Jess’ Guide